Mentorship application DEADLINE is TODAY!
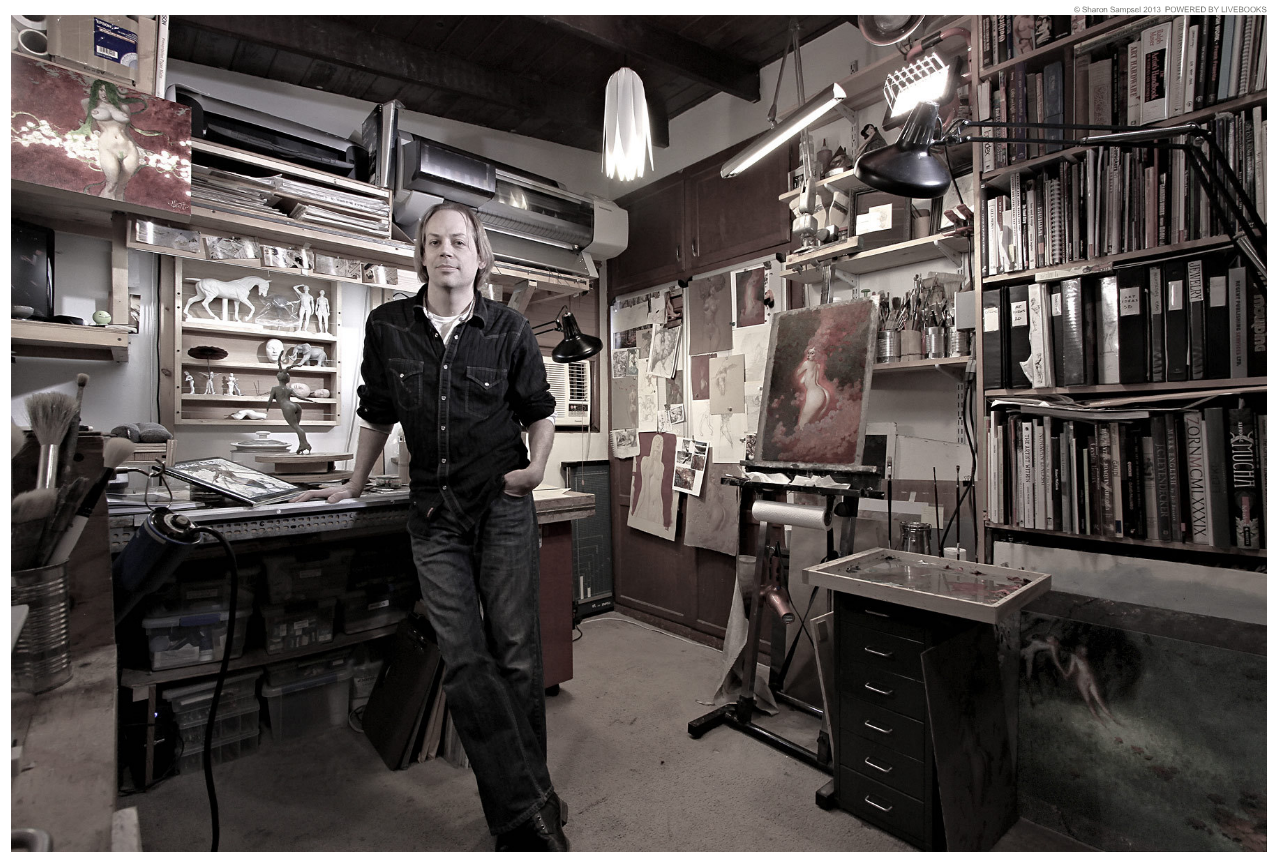
Craig Elliott
Mentorship applications DEADLINE is TODAY!!
Anyone interested in having me as their mentor for the fall don't forget to apply today!
Motivarti.org

Use the form on the right to contact us.
This form will send an email directly to Craig Elliott.
16429 Lost Canyon Road
Santa Clarita, CA, 91387
United States
(661)299-9478
Drawing from the visual worlds of science and nature, the human figure, the grand tradition of American illustration, Japanese scroll paintings and woodblock prints, fantasy illustration, and great artists of Europe, Elliott’s work strikes the viewer at first with a powerful tableau and draws them in to experience the subtlety and beauty within. Beyond the pictorial impact of his work, themes personal to him such as body image, environmental preservation, and social and psychological repression weave themselves throughout his work.
Filtering by Tag: Drawing Instruction
It's "That" time again folks! If you would like to have a one -on-one 10 week mentorship with me, and have me help you learn more about anything you want this is the time and here is the info!
Feel free to post any questions you may have about the program, I'll answer whatever I can. :)
Click the image to open the site or here:

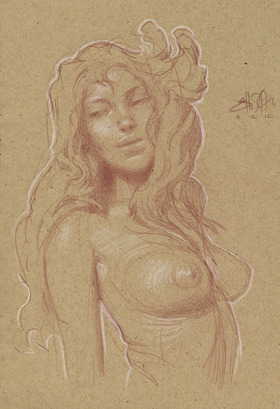
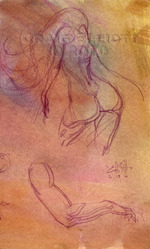
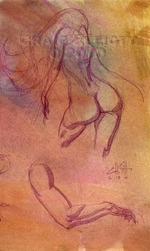
Here are a couple of sketches of Gallery Girls Jennifer Fabos Patton, and Russia Hardy from the even on June 1st at Gallery Godo!
We had wonderful costumes for the models, great music to be inspired by and lots of amazing artists working- I think there were 40+people at this event!
Thank you Jennifer for organizing the event, and thanks to all those who came out to listen to me babble on about art and draw! 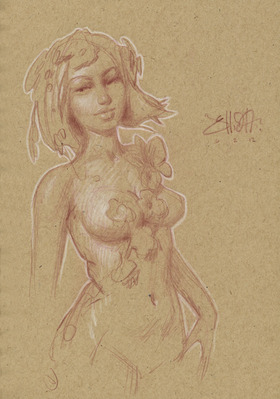
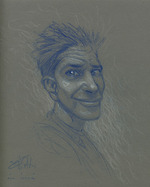
I don't do many portraits, but I have done a few. I think I have only done a limited number of them because I like to know something of the person before I feel comfortable doing one. I think you need to know what the person is really like to know what to draw- otherwise what are you really doing? you don't know! You might accidentally get it right, but you might not.
Here are a couple drawings, one of my friends Melissa and Peter De Seve. Melissa is a very kind energetic and very smart girl with a bright outlook on life (this drawing is meant to be more realistic). Peter has a big heart, has a fun and nutty side (just like his characters) and a very keen eye (Peter's drawing is meant to have a bit of caricature). I hope all of these qualities come through in my portraits! 
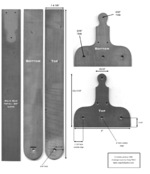 Jim Gurney has posted my photos of the antique drawing tool I foud at an estate sale a few months ago. Some folks on his blog requested a measured drawing, so I have scanned the parts and put measurements on them for those of you who want to make their own!
Some people have asked about the hardware and the wood type used-
The wood appears to be cherry, a good fine grained hardwood, that is obviously tremendously stable, as it has not warped in 111 years!
The hardware is all brass. small wood screws to attach the head to the main ruler and screws with square heads and a washer and wingnut on the top side.
Hope that helps.
-Craig
Another bit of helpful information was sent to me by a visitor, so I thought I would share it with the rest of you- There is a book online about mathematical drawing tools and it has a pretty good instruction guide on how to use the tool! Go to page 169, here is the link:
http://www.archive.org/stream/descriptivetreat00stanrich#page/168/mode/2up
This isn't a post about how to walk down stairs, don't worry! By stairstepping, I mean a way to see subforms on any shape. This way of seeing forms is based of the simple shape of stairs, and when taken to a more sophisticated level resembles the ridges and steps in a shale rock face. One of the artists who most clearly uses this idea is the american illustrator Dean Cornwell. His drawings show this very clearly, and he uses this in his paintings as well, but blends the simple geometry more to create a more finished realistic look.
The basic concept is to imagine a tubular or other basic solid and then carve steps into it that will be in shadow. This technique is great for all sorts of subjects such as trees, rock, buildings and the shapes on an animal or human.
Below are some of the basic steps of this technique as applied to a human figure:
 Figures drawn, and basic outline of steps drawn in line
 Steps filled in with shadow value
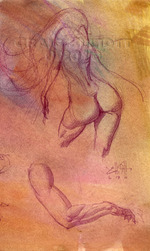 The shadow areas are blended where the edges are soft
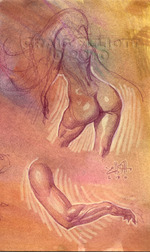 Highlights and smaller details are added
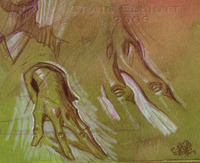
One way to simplify the process and not become overwhelmed by all the parts of what you are trying to draw is to do something I call "Sculpting" the form. So named because it is the same proceedure that you would use if you were sculpting something out of clay. Starting with the most simple masses you can see in what you are drawing you gradually, step by step, add more masses from large all the way down to small.
I have seen the students of Howard Pyle, the father of American illustration, use this technique very often and believe he must have taught something similar in his classes. N.C. Wyeth, Harvey Dunn and their students use this all the time. In addition to this being a drawing proceedure, it is also a way to indicate things further in the distance. The earlier in the process (largest forms and least detail) the drawing is the further away it will appear.
I have chosen a head from a Dean Cornwell painting to illustrate this idea:
1. The left sketch shows the first stage with very large masses, basically an egg of clay with a shelf on it for the eye area. this would be a good stage to stop at for distant figures and crowds. Only 2 values are used here.
2. The next sketch shows the addition of the nose, mouth and cheek subforms. There is also 1 slightly darker value introduced. The best use of this stage of figure is any mid-ground figure of medium importance.
3. Here the same values as the last drawing are used, but smaller forms like the eyes and lip subforms as well as details around the neck are added. Local values (such as the lips, pupils of the eyes and eyebrows) are added to some degree as well. This stage would work well for foreground figures that are not the main focus of the piece.
4. This is the final stage used for close up or focal point figures in paintings, with the final addition of a accent dark and light highlight value.
 Dean Cornwell head study by Craig Elliott
Many people ask me how I draw so quickly, the short, and snarky, answer might be "practice", but that isn't very helpful! The long answer might include perspective, anatomy, technique etc. But, the thing that adds most to my speed when drawing is something called a "Mass Conception". Essentially, what the three dimensional form you are drawing is IN YOUR HEAD before you draw it. Usually, these forms are a nearly perfect geometric solid like a cylinder, cone, sphere, or taurus. The great draftspersons of all time use this idea.
I drew up 3 fingers that display this principle and exaggerate it so you can see it more easily. The knuckles of the fingers illustrate my point. The first finger uses a taurus and is an example of a mass conception used by the great J.C. Leyendecker. The second, a kind of flattened cube, is one of the most common used by many artists, but can be seen clearly in Frank Frazetta's work. The third is a prism- a fairly unique conception used by Michelangelo on some of his Medici sculptures. You can find many more out there and even invent your own.
The point is to actually have a shape in mind that is simple enough to draw BEFORE you draw it. Of course you need to know how to draw all of these basic forms already in perspective, and light them. Remember drawing all those spheres and cones you drew before you were allowed to do life drawing in school? Well, that's why! Most teachers have forgotten why, and the students get bored and frustrated, not knowing why they are doing what they are doing.
Enjoy!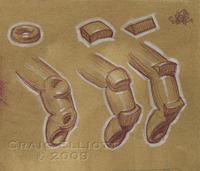
 Study of hands by J.C. Leyendecker
I recently purchased an antique drawing tool from 1890 known as a Cenrtolinead, or Linead from an estate sale. These tools are a tremendous aid in drawing perspective. I have known about these tools for years, and could really have used one for all my perspective work at Disney for the 10 years or so of work I have done for them.
This tool did not come with any instructions, so all I had to go on were catalogs from the early 1900's showing these for sale. They operate using 2 pins and are set to a "Y" shape and equal angles. the photos explain:
120 year old Centrolineaid and other tools usedAngle of "Y" set by drawing (2) 30 degree lines with a triangle.The 2 pins are each placed on a line at 90 degrees to the Horizon, and 3" above and below.
I also set the blades at 10 degrees, and this moves the VP out further than 30 degrees. This seems to restrict the space you can draw in though as seen in the photo. Draw small!An original catalog page from 1910 listing this tool.My conclusion is that this tool is far easier to use than even a ruler with the VP on your board. it is very steady and quick to use. The only drawback is that the tool must be flipped around , one blade moved and new pins inserted to draw the second VP if they are both off the board. This is a somewhat unlikely situation, but it did happen on the larger building facade sketch. the best setup would be to have 2 of these or even 3 for a 3 point perspective drawing. they would make quick work of a complicated drawing like that.
I had a talk with Jim Gurney of Dinotopia fame yesterday to see what he knew about these. He said he had heard of them, and thought of making one someday. Jim will post some of this info on his popular blog to see if we can find someone with the old instruction booklet from one of the original manufacturers. We'll see what happens!
Jim brought up an interesting question in an email to me today- what do you do if you don't want holes in your drawing board? I always used a paper clip with one end bent up or an upside down flat-headed thumbtack taped to the board or paper. this is good for balancing a ruler on for perspective points on the board or for this operation. You could also use a sheet of metal to draw on, even with a Borco cover, and Neodymium magnets about 1/2 cube size for the pins. they are so strong they won't shift...
Update
on 2010-06-23 19:47 by Craig Elliott
Jim Gurney has posted my photos of the antique drawing tool I foud at an estate sale a few months ago. Some folks on his blog requested a measured drawing, so I have scanned the parts and put measurements on them for those of you who want to make their own!


