Video demonstration of the BelleChere portrait
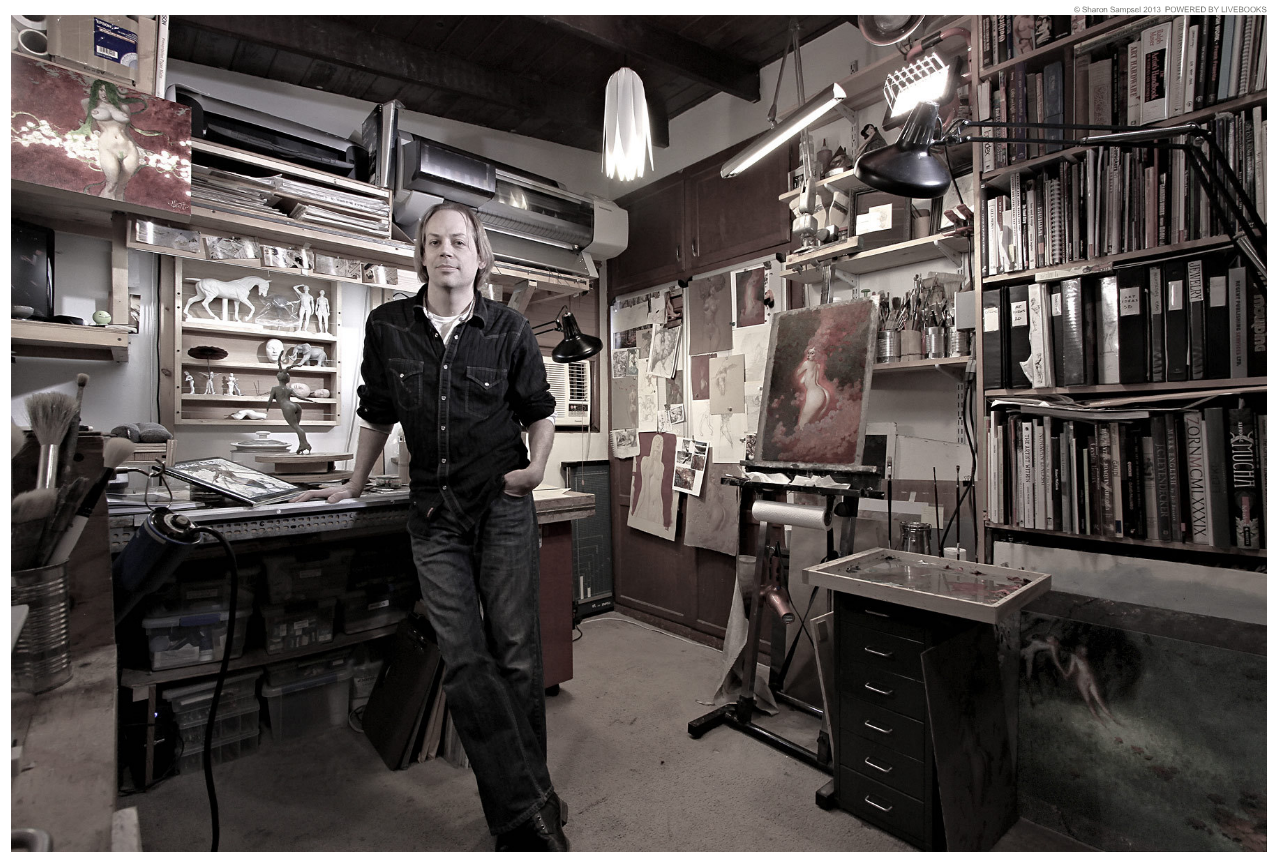
Craig Elliott
A video of the BelleChere portrait, explaining my process of painting- narrated by myself!
Use the form on the right to contact us.
This form will send an email directly to Craig Elliott.
16429 Lost Canyon Road
Santa Clarita, CA, 91387
United States
(661)299-9478
Drawing from the visual worlds of science and nature, the human figure, the grand tradition of American illustration, Japanese scroll paintings and woodblock prints, fantasy illustration, and great artists of Europe, Elliott’s work strikes the viewer at first with a powerful tableau and draws them in to experience the subtlety and beauty within. Beyond the pictorial impact of his work, themes personal to him such as body image, environmental preservation, and social and psychological repression weave themselves throughout his work.
Filtering by Tag: Painting Instruction
A video of the BelleChere portrait, explaining my process of painting- narrated by myself!
For those of you interested in learning some of the techniques and secrets behind creating artwork for film and games, I'll be teaching 2 Gnomon classes again this term.
Just click on the images below to go to the Gnomon site and see the classes that are available!


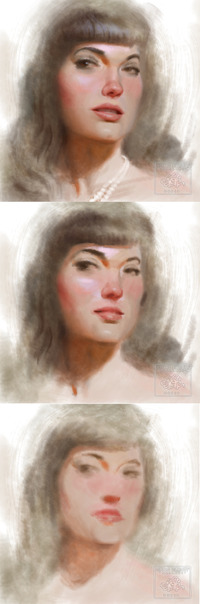
Bettie Page portrait done in Photoshop at the Wacom booth from Siggraph 2013. Thanks to the Creative Talent Network for inviting me to demo!
Here I am just starting the painting of Erin I previously posted so you can see what the early stage of an oil painting looks like.
I start by blocking in some tone to work off of, and the main shapes and colors of the facial skin tones. I then work on my shadows into that tone, and build them up until I feel they are right and then put the highlights in. I go back after that and add more dark accents and final details.
I work very generally to specifically not being afraid to make mistakes because I can fix them as I work.
Enjoy the interview!
 Craig Elliott painting portrait
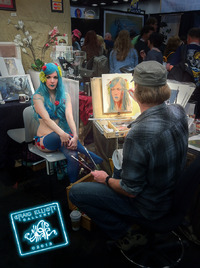 Craig Elliott painting portrait
 Craig Elliott painting portrait

It's "That" time again folks! If you would like to have a one -on-one 10 week mentorship with me, and have me help you learn more about anything you want this is the time and here is the info!
Feel free to post any questions you may have about the program, I'll answer whatever I can. :)
Click the image to open the site or here:

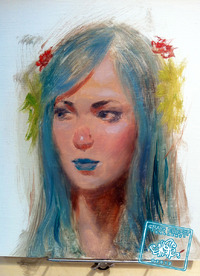
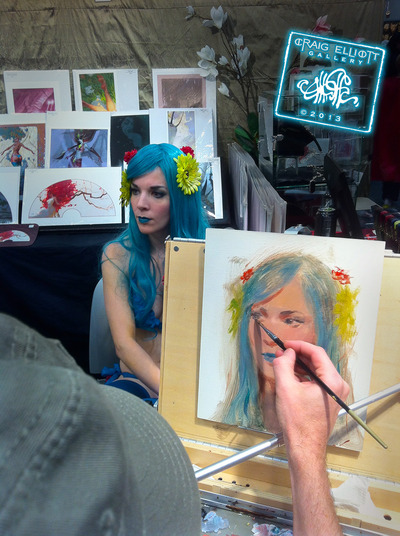
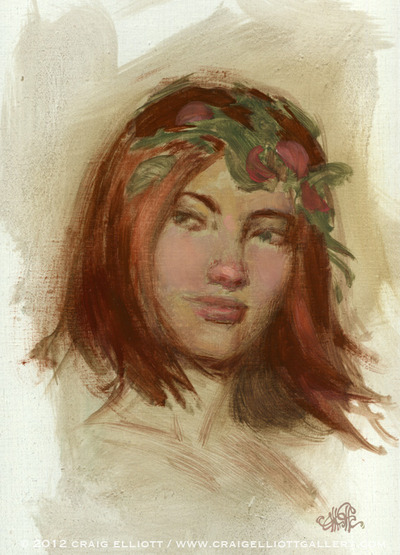
This is a 50 minute painting demo I did for the "Girls and Flowers" event last night. The model is Jennifer Fabos Patton of Gallery Girls fame~
This is an oil painting on a new traditions oil primed linen panel. The painting is in about the middle stage that I go through when creating a finished painting. I have already painted the shadows and done the main lay-in in thin oil. I use just turpentine for thinning the paint, or straight oil paint in that first stage.
Here, in the second stage, there is also the beginnings of the more opaque colors in the cheeks, nose and parts of the hair. This second stage is where I make my color choices for the various tones on the skin. After this stage, if I were to continue, I would continue to add the opaque paint, in the highlights especially, and smoothly blend it into the shadows and other opaque paint areas. The final stage creates a continuous, smooth and mor realistic skin tone.
Here is a short narrated video of me sketching in oil on canvas. The painting is about 9 x 12 inches and was painted in about 2 hours. The oils were thinned wth a medium of 1 part stand oil to 5 parts turpentine, and occasionally thinned with just turpentine.
Enjoy~
Craig
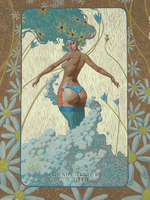 Here is the final painting that will be in the Gallery Nucleus "Poster Peepshow" group exhibition. Come by Feb 5th at 7pm and see this and all the other work, and pick up some free cheesecake or do some life drawing with the Sucide Girls!
See you there!
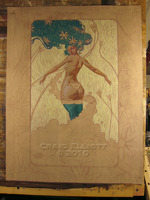
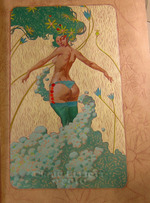
Here, the first shot shows the dark and light sides of the figure blocked in, as well as starting to add flat areas of color in the hair and stockings. The background color and pattern is also finished here, and the drawing corrected a bit with the cream color as I filled it in.
The second image shows an adjusted and darkened skin tone as well as all of the basic colors in the center of the picture blocked in. next I'll move to block in the border colors and then go back into the center panel and make all the finishing touches.
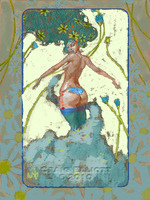 In the first image is a color sketch I have done on top of the drawing from the last post- I just scan the drawing and paint over in photoshop until I get the colors I am looking for. You need a good printer to use this technique for traditional painting. This is because the printout has to be exactly the same as the sketch on the monitor, or it is of no use.
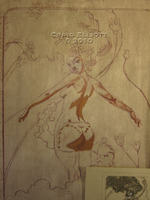 Here I have transferred the drawing to my painting surface. I am painting on Rives BFK paper that has been gessoed white, and then a wash of brown oil has been applied and allowed to dry. I do the drawing in hard colored pencil, and then start to block in the shadows with oil.
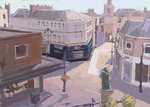
Last night and this morning I did a little world travelling. On the internet that is. There are a fascinating number of public webcams pointed at pretty places all around the world. Paris, Alaska, New York Africa, Etc. I thought that these cameras would make a fun way to watch light and color change in these distant lands. Below are my first experimants of a town square in Scotland. This is "The Cross" in Kilmarnok Scotland around 6 am (the cooler painting) and later around 5pm (the strongly light one). These took about 20-30 minutes each and are sketched in one brush with no pressure sensitivity in Photoshop. 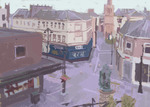
I have been asked what kinds of brushes I use for oil painting from time to time, so I thought I'd help people understand a bit more about them. Bristle brushes are what I use for most of the painting and for all the beginning stages of my oil paintings.
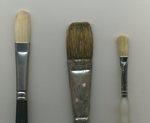 Here is a scan 3 of my bristle (hog hair) brushes as a demonstration of their longevity and quality. The left is a brand-new, top of the line Windsor and Newton bristle brush. In the middle is a 15 year old and VERY high quality bristle brush I have been using, and at the right is an unused low quality bristle brush.
The Windsor and Newton and the older brush both should have a nearly endless life unless you are painting on sandpaper! The cheaper brush MIGHT work for a single painting ok, but will never have the kind of control, flex and shape that a good bristle brush does.
The key differences between these 2 qualities of brush are interlocking, and hair arrangement. Interlocking is a term used to refer to the way the bristles are carefully arranged by the maker to have their natural bend curve toward the center of the brush. This is most easily seen on the middle brush because the stains from the old paint, but it is there on the first brush too. Manufacturers will try and trick buyers who do know that this is a mark of quality by one simple trick. They put soap or some other washable stiffener in the hairs and shape them TEMPORARILY to point towards the center. The best way to find out if this is the case is to carefully knead the stiffener out in the store and see if the hairs still do this. The other factor in quality is the way the hairs are arranged to form the shape of the brush. Filbert and round brushes are the easiest brushes to look for this type of quality. Good quality and good performing brushes have whole hairs carefully arranged to make the pointed shape, of say, a round brush. Individual hog bristle hairs all naturally come to a sharp taper and each have a very fine point. When a brush is arranged well all the pointed ends of the hairs will be at the tip of the brush, none will stick out in a stray manner and none will have fuzzy or blunt ends. Cheap hair arrangement (if you can call it that) will have a combination of fuzzy, blunt and sharp hairs. These brushes are often just stuffed with hair, and then SANDED on a power sander to shape them. this creates a terrible brush with hairs that stick out everywhere, fall out on to your painting and have very little control.